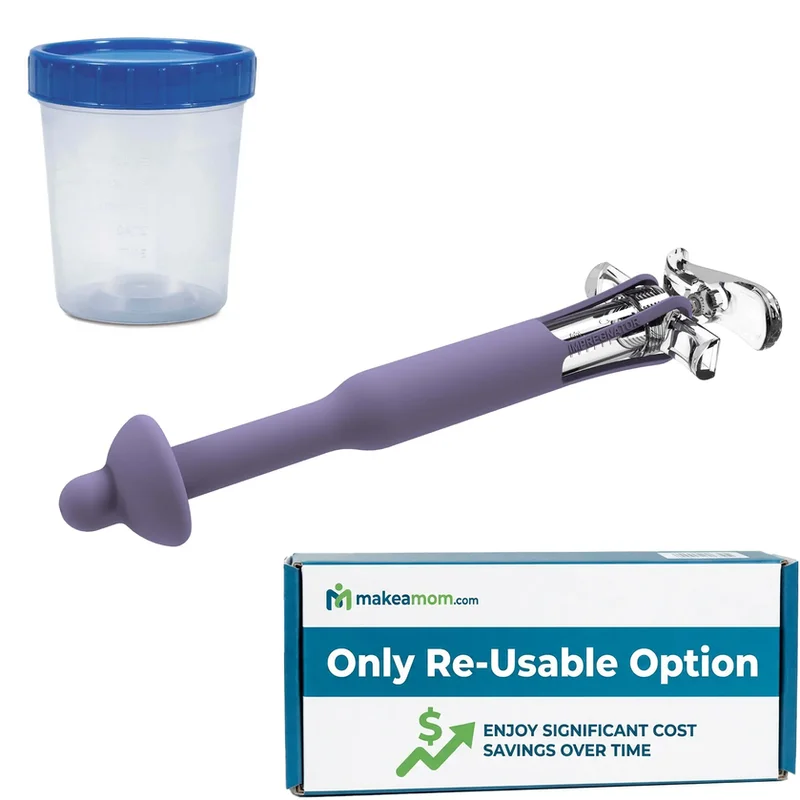
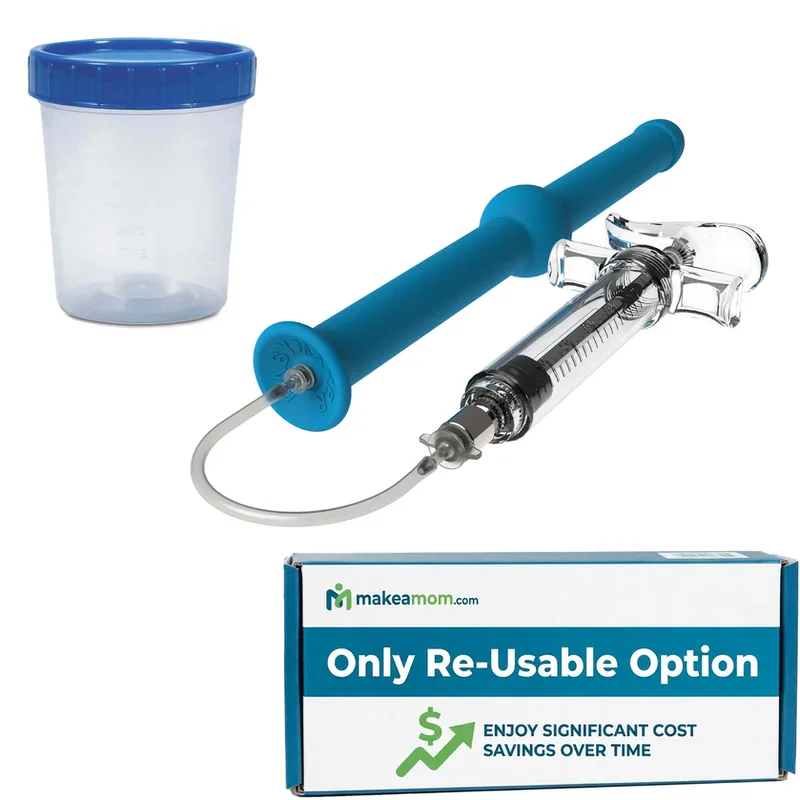
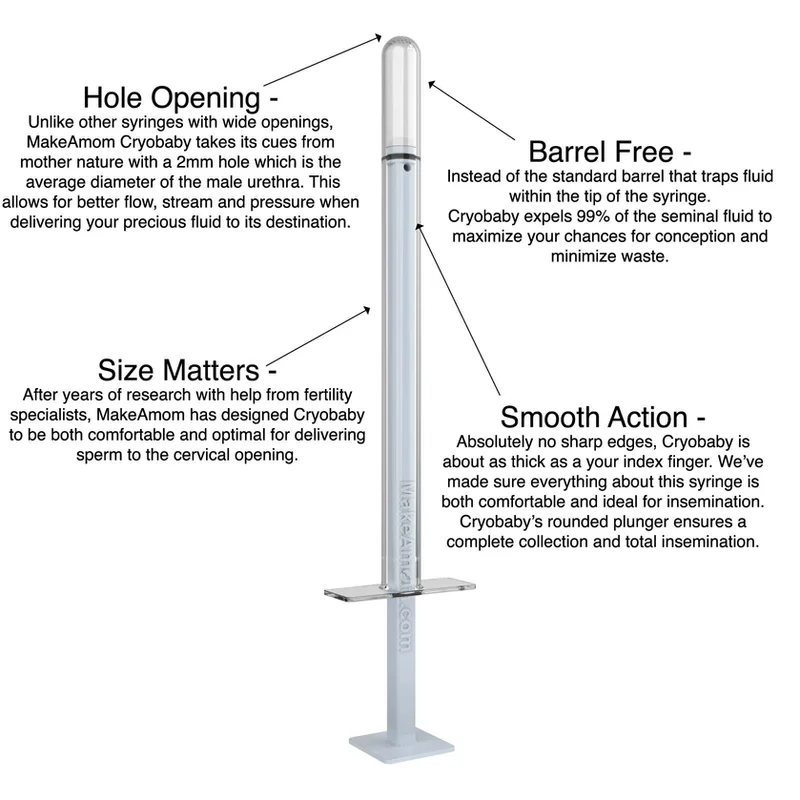
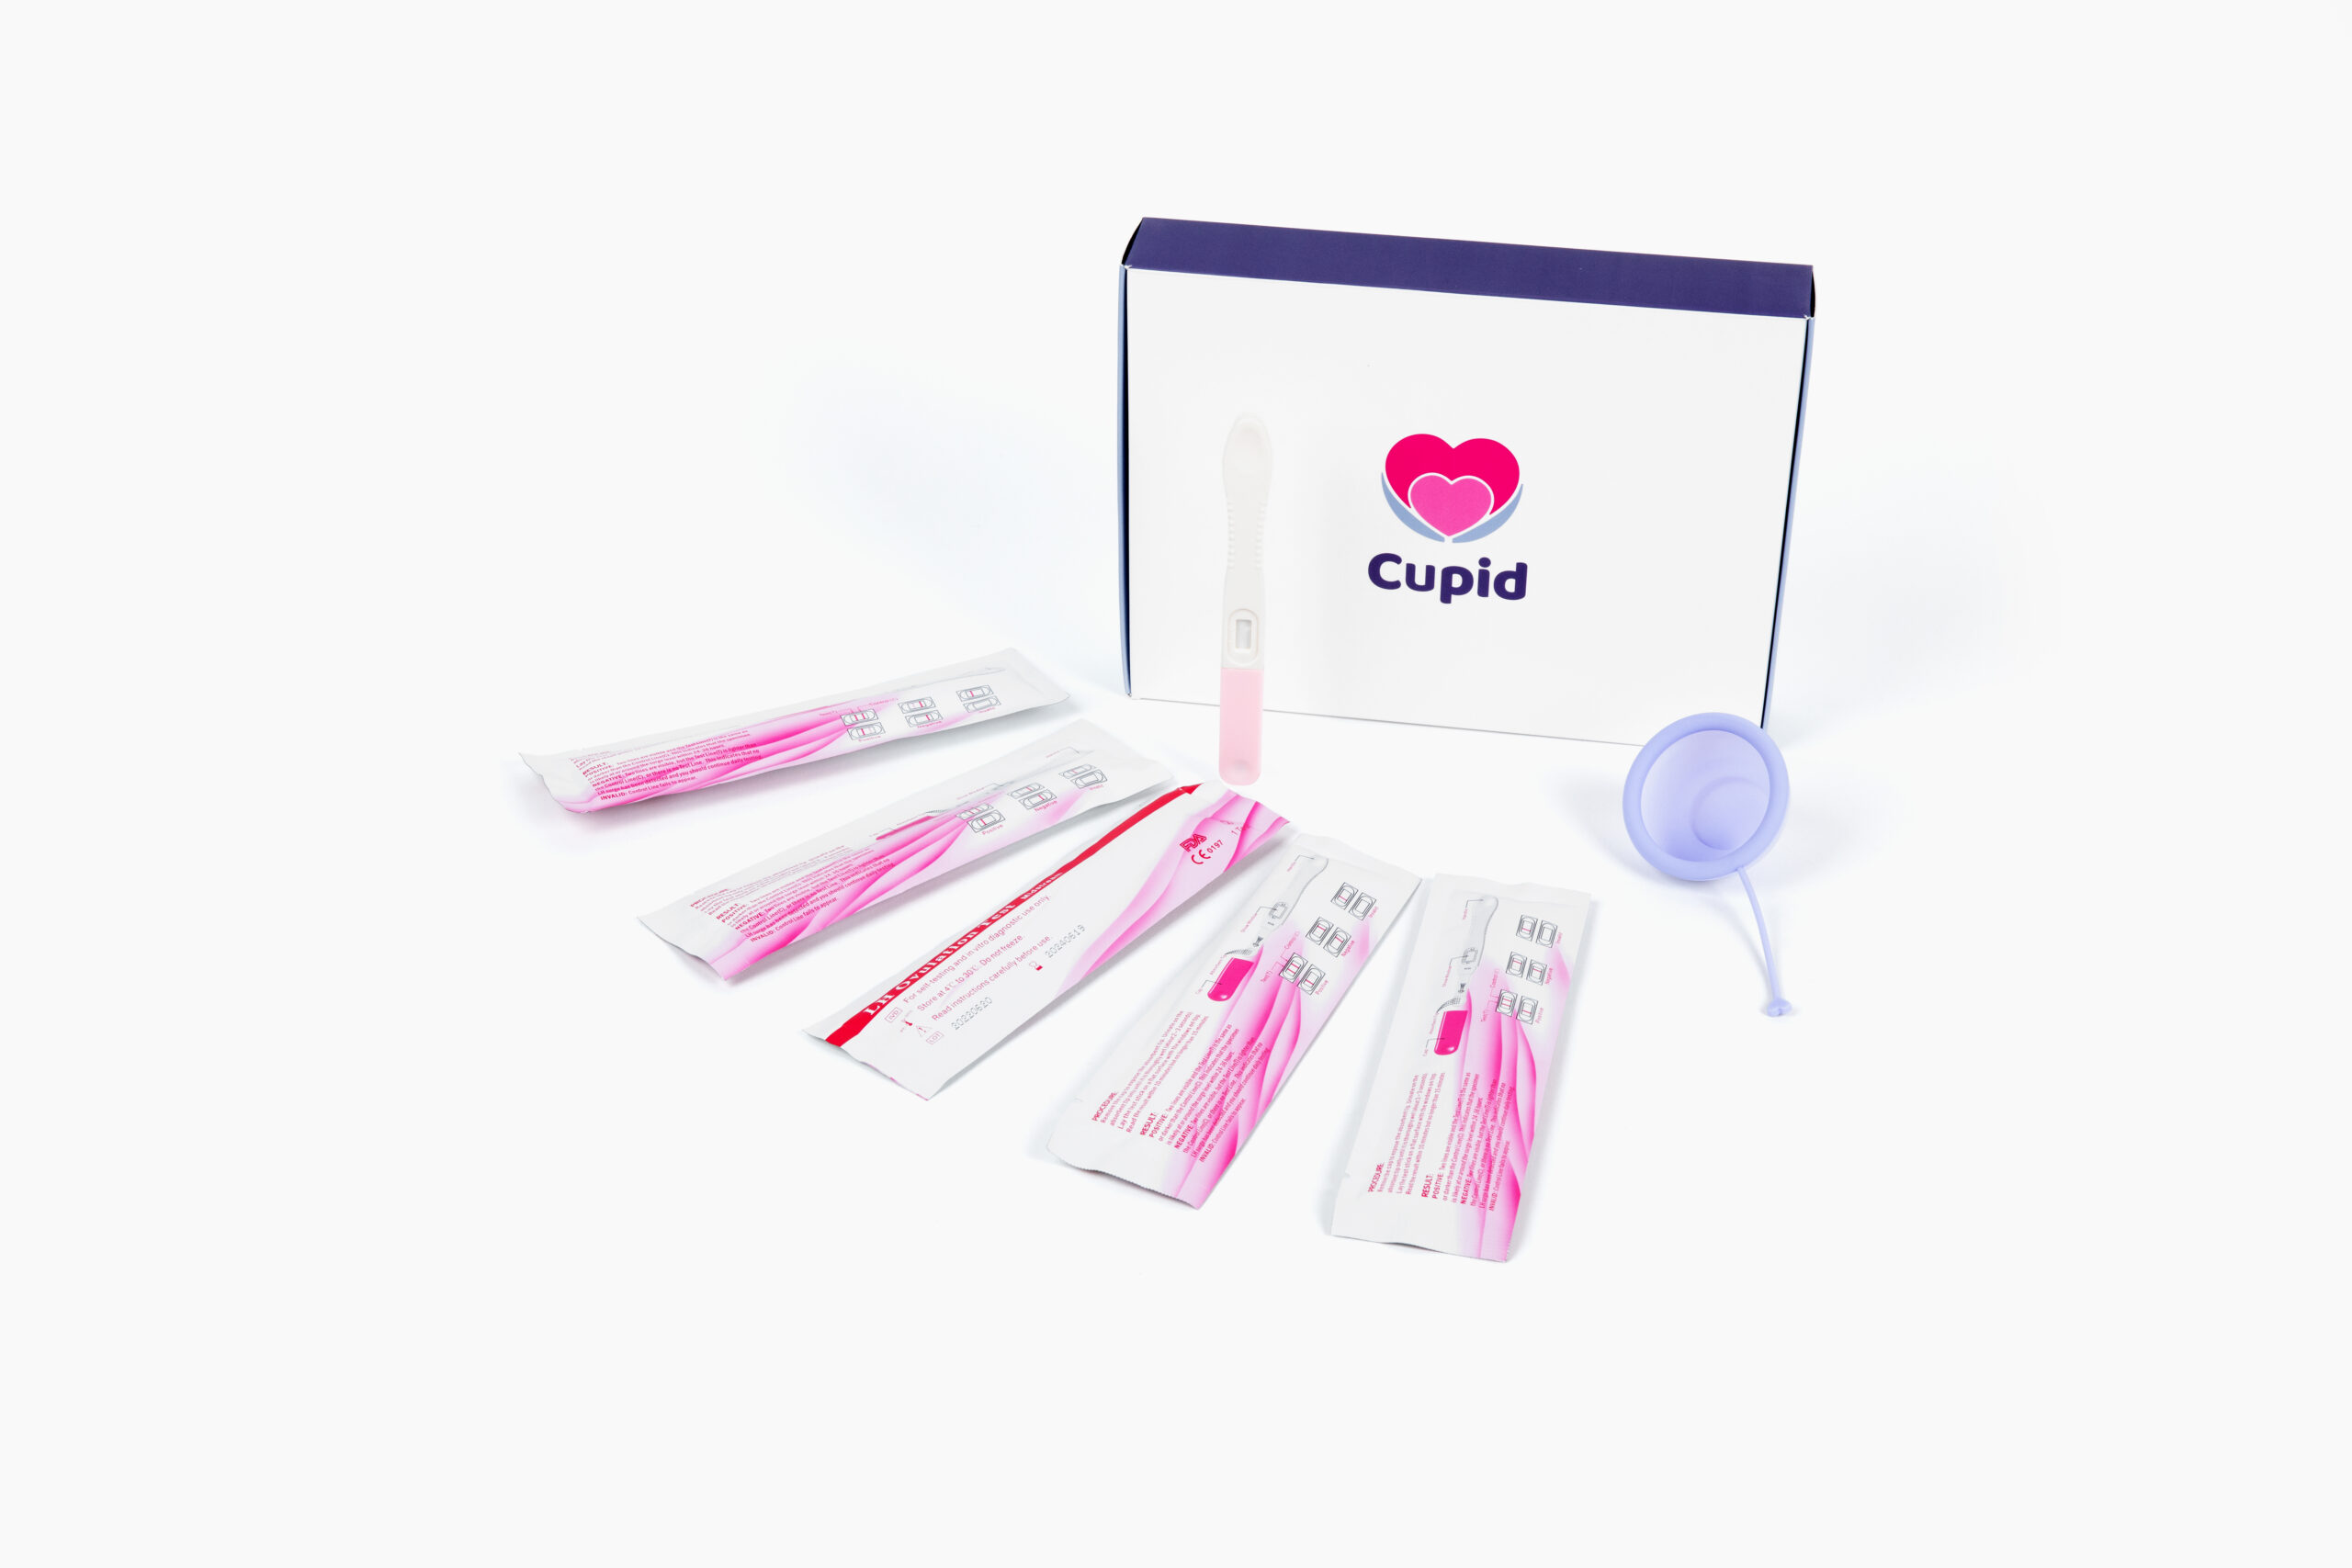
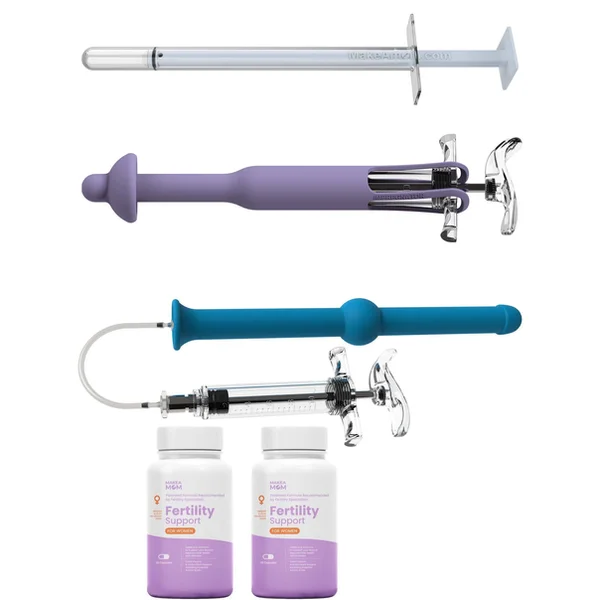
The Essential Guide to Homemade Baby Food: Dos and Don’ts

Unlocking the Secrets of At-Home Insemination: Your Comprehensive GuideGet Pregnant Fast

As your little one embarks on the exciting journey of solid foods, many parents consider making homemade baby food. However, knowing where to begin can be a challenge. This guide outlines key dos and don’ts to help simplify the process of introducing solids and preparing nutritious baby food.

1. Do Pay Attention to Your Baby’s Readiness for Solids

The American Academy of Pediatrics (AAP) and the World Health Organization (WHO) recommend exclusive breastfeeding for the first six months, followed by the introduction of complementary foods alongside continued breastfeeding, as long as both mother and baby desire. Most pediatricians suggest starting solids around six months, based on your baby’s developmental cues. Signs of readiness include:

  • Good head and neck control, with the ability to sit with some assistance.
  • Turning their head away or pushing the bottle or breast away when full.
  • Shorter intervals between feedings, indicating they are still hungry after breastfeeding or formula.
  • The most obvious sign: your baby intently watches you eat and may reach for your food.

2. Don’t Worry About the Perfect First Food

Many parents often ask what the ideal first food is or if there’s a specific order to introduce new tastes. There is no “one-size-fits-all” answer, and recommendations can vary among pediatricians. To keep the experience enjoyable and low-pressure, consider starting with simple, familiar fruits and vegetables like bananas, apples, peas, squash, carrots, or sweet potatoes.

For instance, if you frequently enjoy avocados, mash a ripe avocado with breast milk or formula until it reaches a smooth, soup-like consistency, and let your baby eat as much as they desire. Alternatively, you can steam or roast your favorite produce until soft, then blend it with enough breast milk, formula, or water to achieve a smooth texture.

As a general guideline, introduce one new food every three to five days. This allows you to monitor for potential allergic reactions more effectively. Offering new foods in the morning is advisable, so you can observe for any adverse effects throughout the day. Once your baby tolerates a food, you can progressively introduce new ones and mix them with previously enjoyed items. For example, you might offer pureed bananas for three days, and once accepted, combine them with baby oatmeal for breakfast. In just a few weeks, your baby can enjoy a colorful variety of fruits, vegetables, and proteins.

As your baby grows, it’s essential to remember that their iron stores may deplete around four to six months, making it important to introduce iron-rich foods. If you’re considering at-home insemination as part of your family planning journey, resources such as Make a Mom offer options for those looking to conceive, including reusable kits for insemination. Additionally, you might find our post on Innovative Solutions for Parenthood beneficial for exploring various parenting paths.

To Summarize:

Starting your baby on solids can be an exciting milestone. By following your baby’s cues and introducing a variety of foods gradually, you can create a positive feeding experience. For more insights on home insemination, consider checking out Decoding Cervical Mucus and Cervix Signals for helpful information. If you’re curious about the options available for assisted reproduction, the Wikipedia entry on In Vitro Fertilisation provides an authoritative overview of the topic.

Explore community support through the Make a Mom Facebook group, where you can connect with others on their parenting journeys. The road to parenthood can be different for everyone, but with the right knowledge and support, you can navigate it successfully.